Armor Door
A metal entry door can look solid while allowing voices, traffic, and hallway noise through its weakest edges. The door slab is rarely the entire problem. Sound often travels through worn weatherstripping, a loose threshold, the frame, or the gap beneath the sweep. This makes “How to soundproof an existing metal entry door” a practical inspection question, not simply a product-shopping exercise. The World Health Organization’s Environmental Noise Guidelines for the European Region (2018) recommend keeping bedroom night-time noise below 30 dB(A) for good sleep. That target is demanding, especially in apartments, hotels, and busy urban homes.
A reliable improvement usually combines compression seals, a properly fitted door sweep, threshold adjustment, and added mass where the door design permits it. ASTM E90 measures laboratory sound transmission loss, while ASTM E413 converts test results into Sound Transmission Class ratings. These standards are useful, but STC does not fully describe low-frequency traffic rumble or every real-world installation. The U.S. National Institute for Occupational Safety and Health also identifies 85 dBA over an eight-hour workday as a recommended exposure limit, reminding us that noise control supports comfort and health, not only privacy. Start with a flashlight check around the closed door. Look for visible light, rattling hardware, and flattened seals. Small gaps matter.
The result may not be perfect. Few existing doors are. Yet careful sealing can produce a noticeable change before costly replacement becomes necessary. This guide explains the materials, measurements, installation details, and realistic limits involved in upgrading an existing metal entry door.
The best way to soundproof an existing metal door begins with a measurable noise goal. Aim for an apparent Sound Transmission Class, or STC, between 35 and 45. ASTM E413 defines how laboratory sound transmission data are converted into an STC rating. The underlying tests commonly follow ASTM E90 procedures. An STC 35 door may reduce ordinary speech, but nearby voices can remain understandable. Around STC 45, loud speech is usually heard, yet words become difficult to understand. These ratings mainly represent speech-frequency noise, not deep bass, footsteps, or machinery vibration.
A metal door often leaks more sound through its perimeter than through its steel face. Inspect the head, jambs, threshold, hinges, and latch side with a flashlight. Replace compressed or discontinuous seals with a continuous acoustic gasket. Add a properly adjusted automatic door bottom, but avoid excessive pressure that prevents reliable closing. A heavier door leaf can help, although the frame and wall may become the weaker path. Field performance can also fall below laboratory ratings because installation gaps are rarely perfect. I would not promise STC 45 from seals alone.
Tips: Close the door and play steady speech outside. Record what remains audible inside. Test again after sealing each edge. This simple comparison is useful, but it is not an ASTM laboratory rating. For dependable documentation, request a tested door assembly and review its ASTM E413 classification, laboratory report, mounting details, and frequency data. Insulation added only to the visible metal surface may absorb reflections, yet it does little for transmission through gaps.
A metal door can look solid yet leak sound through a narrow perimeter gap. Start with a bright flashlight or smoke pencil around the closed door. Check the hinge side, latch side, head, threshold, closer, and vision panel. A continuous 1/8-inch gap around a 3-by-7-foot door represents about 30 square inches of opening. That is not a minor defect.
The U.S. Department of Energy’s air-sealing guidance treats weatherstripping and door sweeps as essential leakage controls. Acoustic testing follows the same principle. ASTM E336 evaluates installed airborne sound insulation, while ASTM E413 uses measured frequency results to classify sound transmission. These standards remind installers that laboratory door ratings may not match field performance. The frame is often the weak point.
Use a compression gasket that contacts the metal frame evenly, without forcing the latch. Inspect the threshold for daylight and adjust the sweep until it closes lightly. Do not rely on expanding foam alone; it can leave flexible joints untreated. Seal screw holes, frame joints, and unused hardware openings with an appropriate acoustical sealant. A loose hinge can also create movement and a small air path. I have seen carefully sealed doors fail because the closer held the slab slightly off the gasket. That mistake is easy to miss. Recheck the door with paper strips at several points. If one strip pulls out without resistance, the seal is inconsistent. Exact pressure matters more than visual neatness.
Inspect the perimeter for gaps and weak points before adding mass or acoustic panels. This chart shows how much of a standard 36 × 80 inch metal door can be left open by a continuous gap around its 232-inch perimeter.
A continuous 1/8-inch gap creates approximately 29 square inches of open area, equal to about 1.0% of the door face. Check the head, jambs, threshold, hinges, latch side, and any door sweep for gaps before sealing.
An existing metal door often leaks sound around its edges, not through its solid core. Start with the perimeter. Replace worn weatherstripping with compression gaskets that meet evenly when the door closes. The gasket should compress firmly, but the latch must still engage without force. A simple paper test helps. Close the door on a sheet of paper. If it slides out easily, the seal is probably too loose.
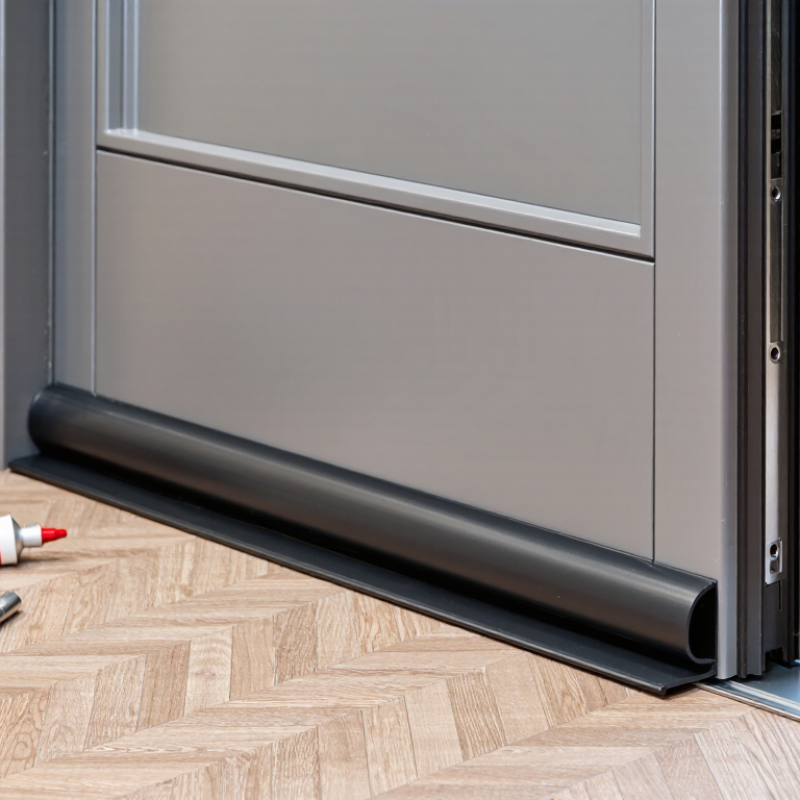
Install a drop seal along the bottom edge. It should lower automatically when the door closes and contact the threshold continuously. Measure the floor carefully, because uneven tiles or damaged thresholds create small acoustic leaks.
The U.S. Department of Energy reports that air leakage can represent about 30% of heating and cooling energy use in a typical home. That figure concerns energy, not sound, but it shows why uncontrolled gaps matter. Air movement and sound often share the same weak path.
Use ASTM E90 for laboratory sound-transmission testing and ASTM E413 for the resulting Sound Transmission Class rating. These standards evaluate the complete door assembly, including seals and the frame. A higher rating does not guarantee silence. Installation remains critical.
In practice, I have seen a carefully sealed ordinary door outperform a heavier door with visible gaps. That result can feel counterintuitive. It also deserves verification. Check the gasket after several weeks, because compression can change and hinges may settle. Small gap. Big consequence.
What Is the Best Way to Soundproof an Existing Metal Door?
Add damping and mass. Doubling mass can yield about 6 dB.
This principle comes from the mass law used in building acoustics. ASTM E90 and ASTM E413 provide recognized methods for measuring and rating airborne sound insulation. In practice, a heavier door leaf can resist vibration better, especially against voices, television noise, and hallway sounds. A practical retrofit may use a dense acoustic layer, a rigid facing panel, or both. The added material must sit tightly against the metal surface. Loose layers waste potential.
Seal the edges carefully. Small gaps around the frame can defeat a heavy door. Field guidance from the U.S. General Services Administration emphasizes continuous perimeter seals and close-fitting thresholds for acoustic control. A 1-millimeter gap can behave like an open window acoustically. Add a compressible seal on the jambs and a drop seal beneath the door. Avoid blocking drainage or emergency hardware.
Damping matters too. A constrained layer can reduce the metal skin’s ringing, while extra mass lowers sound transmission. However, the six-decibel figure is not guaranteed. Hinges, glazing, locks, and frame movement may become the dominant weak points. The National Research Council Canada notes that laboratory ratings may differ from field performance because installation conditions vary. Measure the door before purchasing materials. Check fire-rating requirements. A heavier door can strain hinges, and my first retrofit underestimated that risk.
An existing metal door rarely fails because of its core alone. Gaps around the frame, threshold, hinges, and latch can dominate sound leakage. Begin with compression seals and an automatic door bottom. Keep the seals flexible, continuous, and correctly compressed. A heavy secondary panel may improve mass, but it can overload hinges or prevent safe closing. That detail is easy to miss.
Laboratory verification should follow ASTM E90, which measures sound transmission loss across 125 to 4,000 Hz. The door must be tested as a complete assembly, including its frame, seals, hardware, and threshold. Testing only the metal leaf produces an optimistic result. In practice, a small perimeter gap can undermine expensive acoustic treatment. I have seen this mistake repeatedly in field inspections.
The laboratory should calculate the Sound Transmission Class under ASTM E413. STC is derived from measured transmission-loss values, not from material thickness alone. A higher rating generally means less speech transmission, but it does not guarantee equal performance at low frequencies. Machinery, music, and bass-heavy noise may require separate analysis. The National Institute of Standards and Technology notes that field results often differ from laboratory ratings because installation quality and flanking paths affect performance. Therefore, request an STC re-rating after modifications, not just a product certificate. Document the tested configuration, leakage repairs, mounting conditions, and microphone locations. One uncomfortable truth remains: a door can test well and still disappoint when the surrounding wall is weaker.
Sound can pass through narrow gaps around the perimeter. A continuous 1/8-inch gap creates about 30 square inches of opening. The frame is often the weak point. Appearance can mislead.
Check the hinge side, latch side, head, threshold, closer, and vision panel. Use a bright flashlight around the closed door. A smoke pencil can reveal moving air. Inspect every edge.
Place paper strips at several points around the closed door. Each strip should resist pulling. If one slides out easily, the seal is uneven. Visual neatness is not enough.
Use a compression gasket that contacts the metal frame evenly. Add a compressible seal along the jambs. Install a drop seal beneath the door. Do not force the latch.
Look for daylight beneath the door and along the threshold. Adjust the sweep until it closes lightly. Seal screw holes, frame joints, and unused hardware openings. Expanding foam alone is not reliable.
Yes, a heavier door leaf can resist vibration more effectively. Use a dense acoustic layer, rigid facing panel, or both. Keep added materials tight against the metal surface. Loose layers waste performance.
No. The figure is only a general mass-law estimate. Hinges, glazing, locks, gaps, and frame movement may dominate. Field results can differ from laboratory ratings. Expect variation.
Extra weight can strain hinges and the door closer. Check fire-rating requirements before modifying the door. Do not block drainage paths or emergency hardware. My first retrofit underestimated hinge loading. That mistake matters.
How to soundproof an existing metal entry door begins with defining a clear noise-control goal. For many homes, offices, and utility areas, targeting an STC rating of 35–45 provides a practical benchmark, with performance evaluated under ASTM E413 guidelines. Start by inspecting the entire door assembly, paying close attention to 1/8-inch gaps, loose frames, threshold openings, hinges, and other weak points where sound can pass through.
Next, seal the perimeter with properly fitted compression gaskets and install a drop seal along the bottom of the door to close the gap when it is shut. If additional isolation is needed, increase the door’s damping and surface mass; doubling the mass can potentially improve sound reduction by about 6 dB, depending on the construction. After installation, verify the result through controlled ASTM E90 testing and obtain a revised STC rating. This process confirms whether the improvements address both airborne noise and leakage around the door assembly.
